Dwinelle Navigator
Abstract
Dwinelle Hall is a notoriously labyrinthian building on the UC Berkeley campus. Our project is a browser-based 3D representation of the building, complete with interactive directions between the many entrances, exits, and rooms.
We obtained the geometry of Dwinelle Hall as well as the pathfinding algorithm from existing work by Daniel Kessler. Kessler’s wireframe representation of Dwinelle is a collection of 3D points connected by lines.
From this representation we:
- created hallway objects following vectors between these 3D points,
- replaced the white backdrop with an environment map of Strawberry Creek,
- updated the user interface to comply with Material Design and to work better on mobile devices,
- and implemented 3rd- and 1st-person camera fly-throughs of paths between rooms.
For the 3D model, we used Three.js, a library built to improve on WebGL. In addition, we used the Three.js library OrbitControls and the interpolation library Tween.js
For the user interface improvements, we used Materialize, a CSS library.
Click Here for the Full-Screen DemoTechnical approach
Turning a Wireframe Into Realistic Hallways
Kessler’s model is comprised of 3D points which are connected by vectors. We could have hard-coded the building's interior, but we instead opted for a procedural approach wherein we would use vectors to guide the direction and location of each hallway.
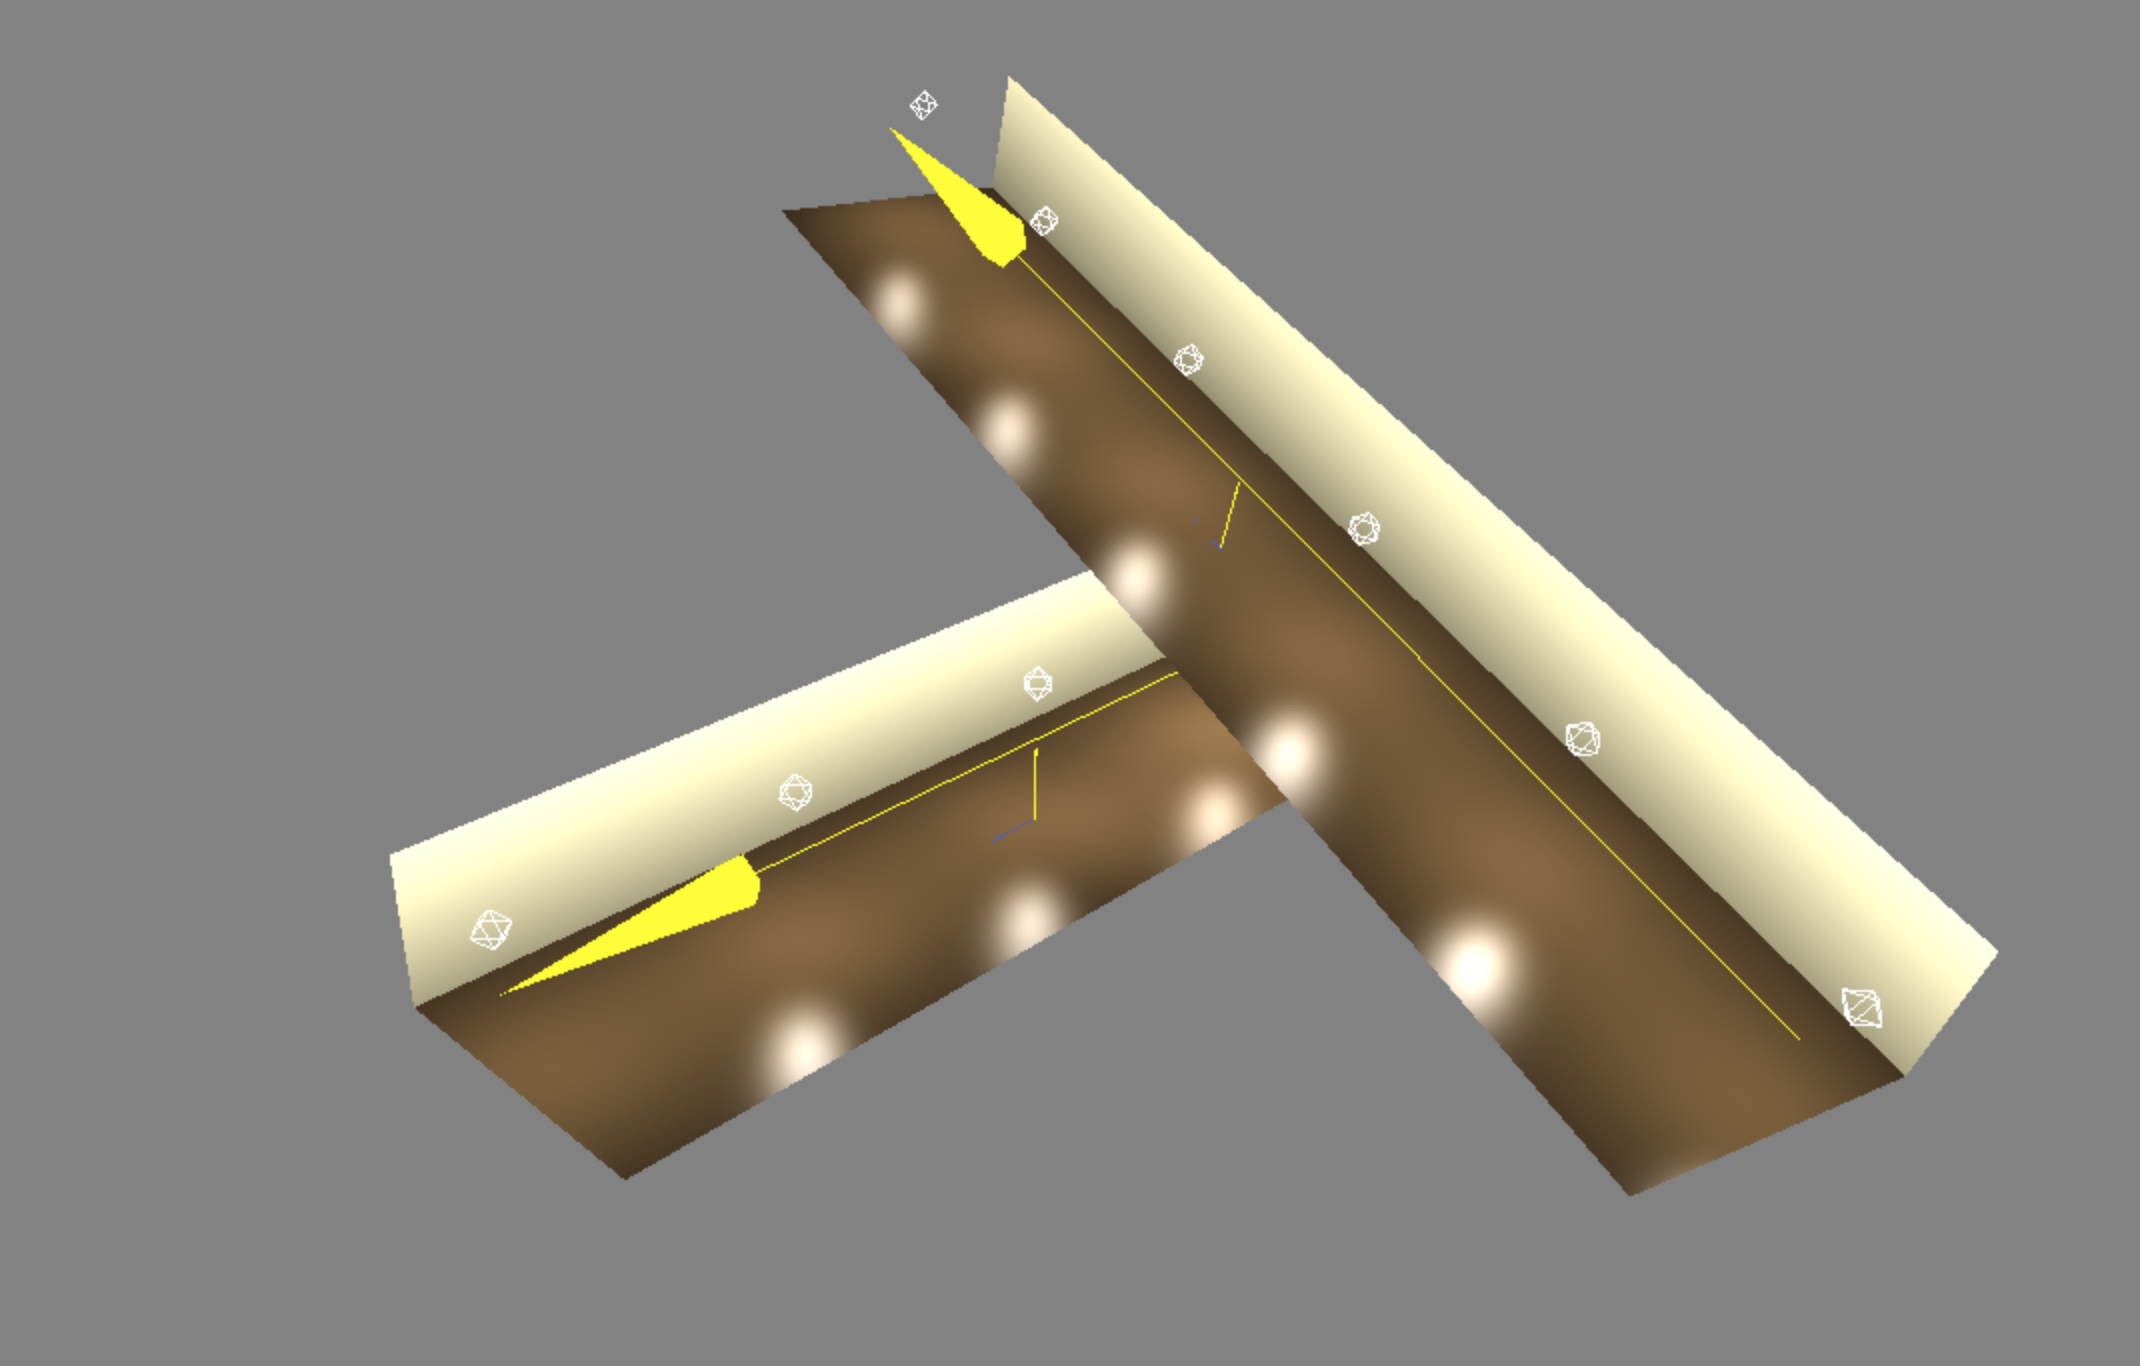
Creating a hallway that would look realistic following any vector - even one with an unusual direction and not centered at the origin - proved to be very challenging problem. As a baseline, we determined that the floor needs to be on the bottom and looking up, and obviously it has to be parallel to the vector so that they follow the same path.
We tackled this problem with trial and error, and a lot of pen-and-paper calculations. The first challenge was representing the floor of a hallway.
Here are some baseline ideas that guided our process:
- Meshes, lights, and other objects, such as the
PlaneGeometryobject are all children of theObject3Dobject. - The
Object3Dobject has alookAtattribute, which defines the direction in world coordinates that its normal vector points to. Changing the value of an object'slookAtwill cause it to rotate in space around itsposition. - In Three.js, planes are positioned based on the location of their center. In the image above, the shorter lines point from the
positionof their respective planes to the midpoint of their respective vectors. In fact, the shorter lines are just extended versions of the each plane's normal vector.
Once we discovered those facts, we realized that we could make a plane "follow" a vector by modifying a its position and lookAt attributes.
Our strategy was as follows:
- Since hallways are on the bottom of a space, looking up, a floor's
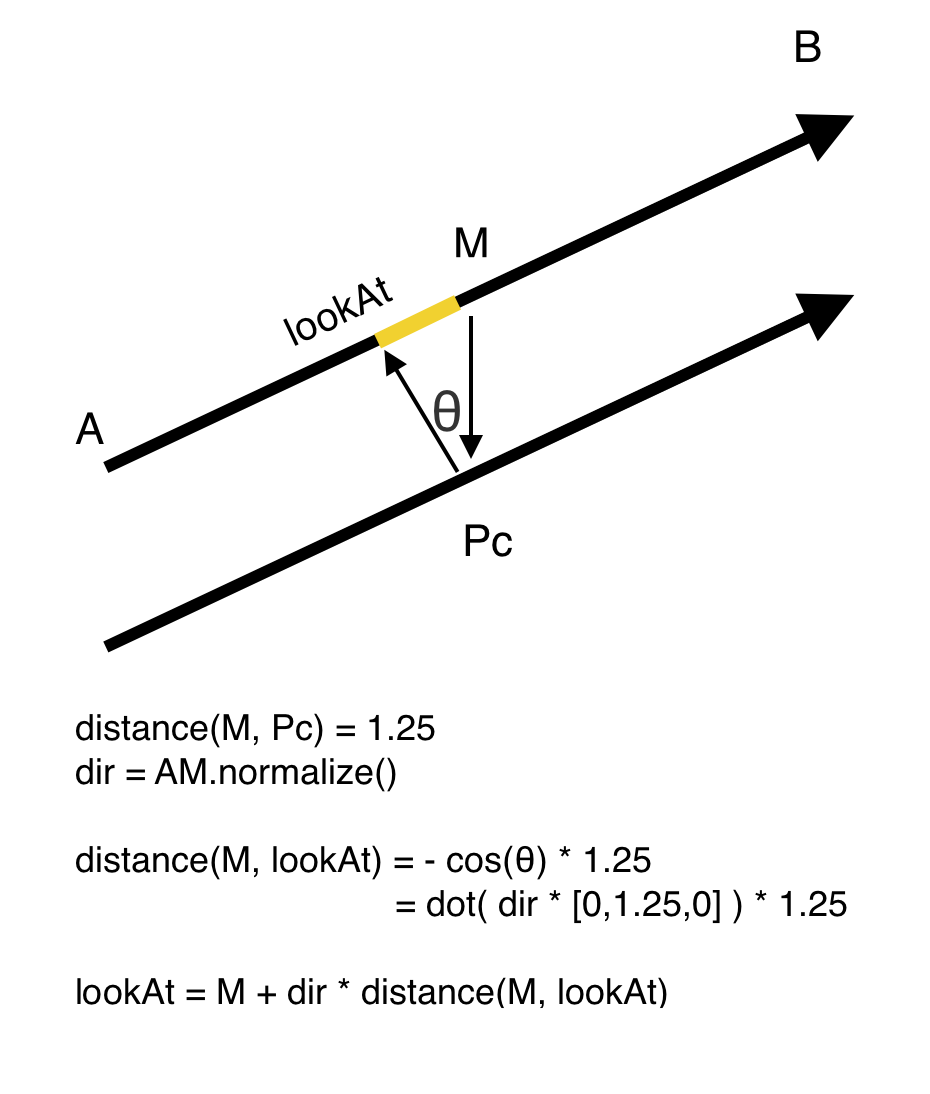
positionshould be 1.5 meters directly below the midpoint of the vector. - Since we need the floor to be parallel to the vector, the
lookAtattribute should be a point along the vector such that a line betweenlookAtandpositioncreates a right angle with the vector.
Those constraints, after hours of failed approaches, led us to a solution. Here is a diagram of that solution.
At this point we thought we had successfully aligned our hallways, but we had left a degree of freedom unconstrained!
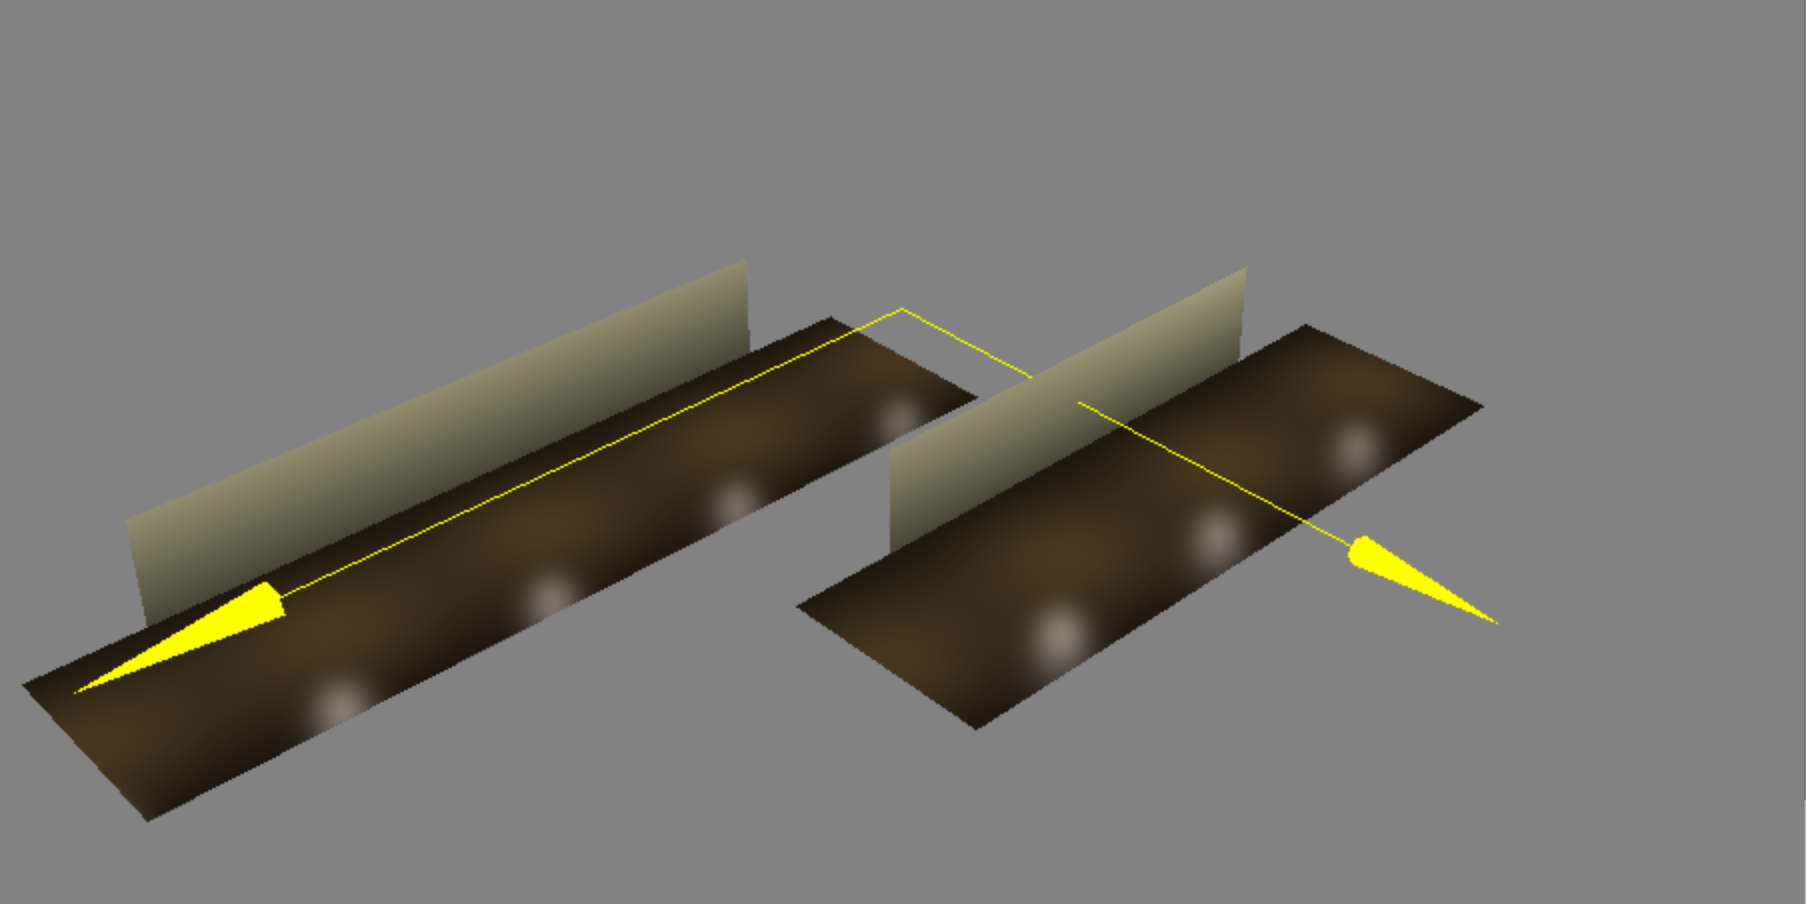
Here is what that would have looked like on the wireframe if we had not fixed the problem:
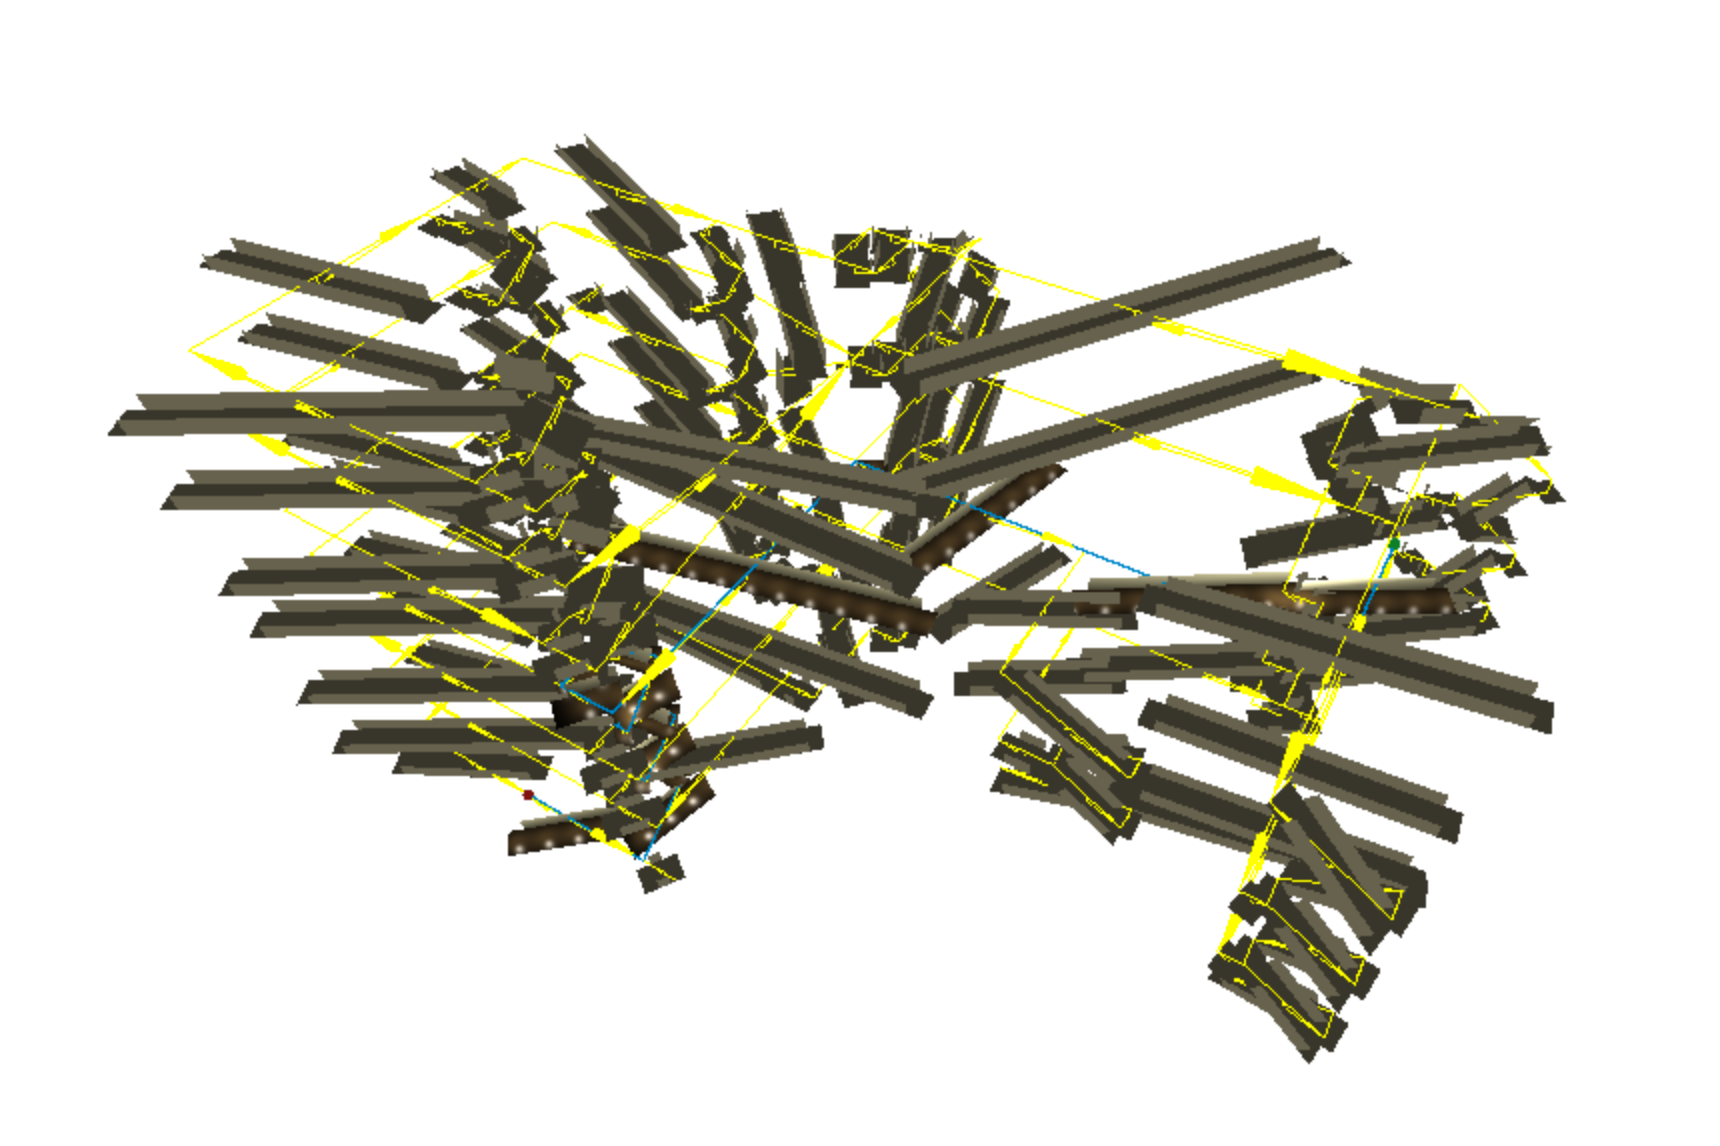
The final step was to specify an appropriate up attribute to the planes. Here is an excellent explanation of the up vector's role by user WestLangley on StackOverflow.
When you call
Object.lookAt( vector ), the object is rotated so that its internal z-axis points toward the target vector.But that is not sufficient to specify the object's orientation, because the object itself can still be "spun" on its z-axis.
So the object is then "spun" so that its internal y-axis is in the plane of its internal z-axis and the up vector.
The target vector and the up vector are, together, sufficient to uniquely specify the object's orientation.
For this particular case, the solution was to set the up attribute of the plane to point in the same direction as the vector, if the vector had started at the origin of the plane. The approach is a little mind-bending once you account for world vs. object coordinates:
space.updateMatrixWorld();
space.up = planeCenter.add(space.worldToLocal(dir)).normalize();
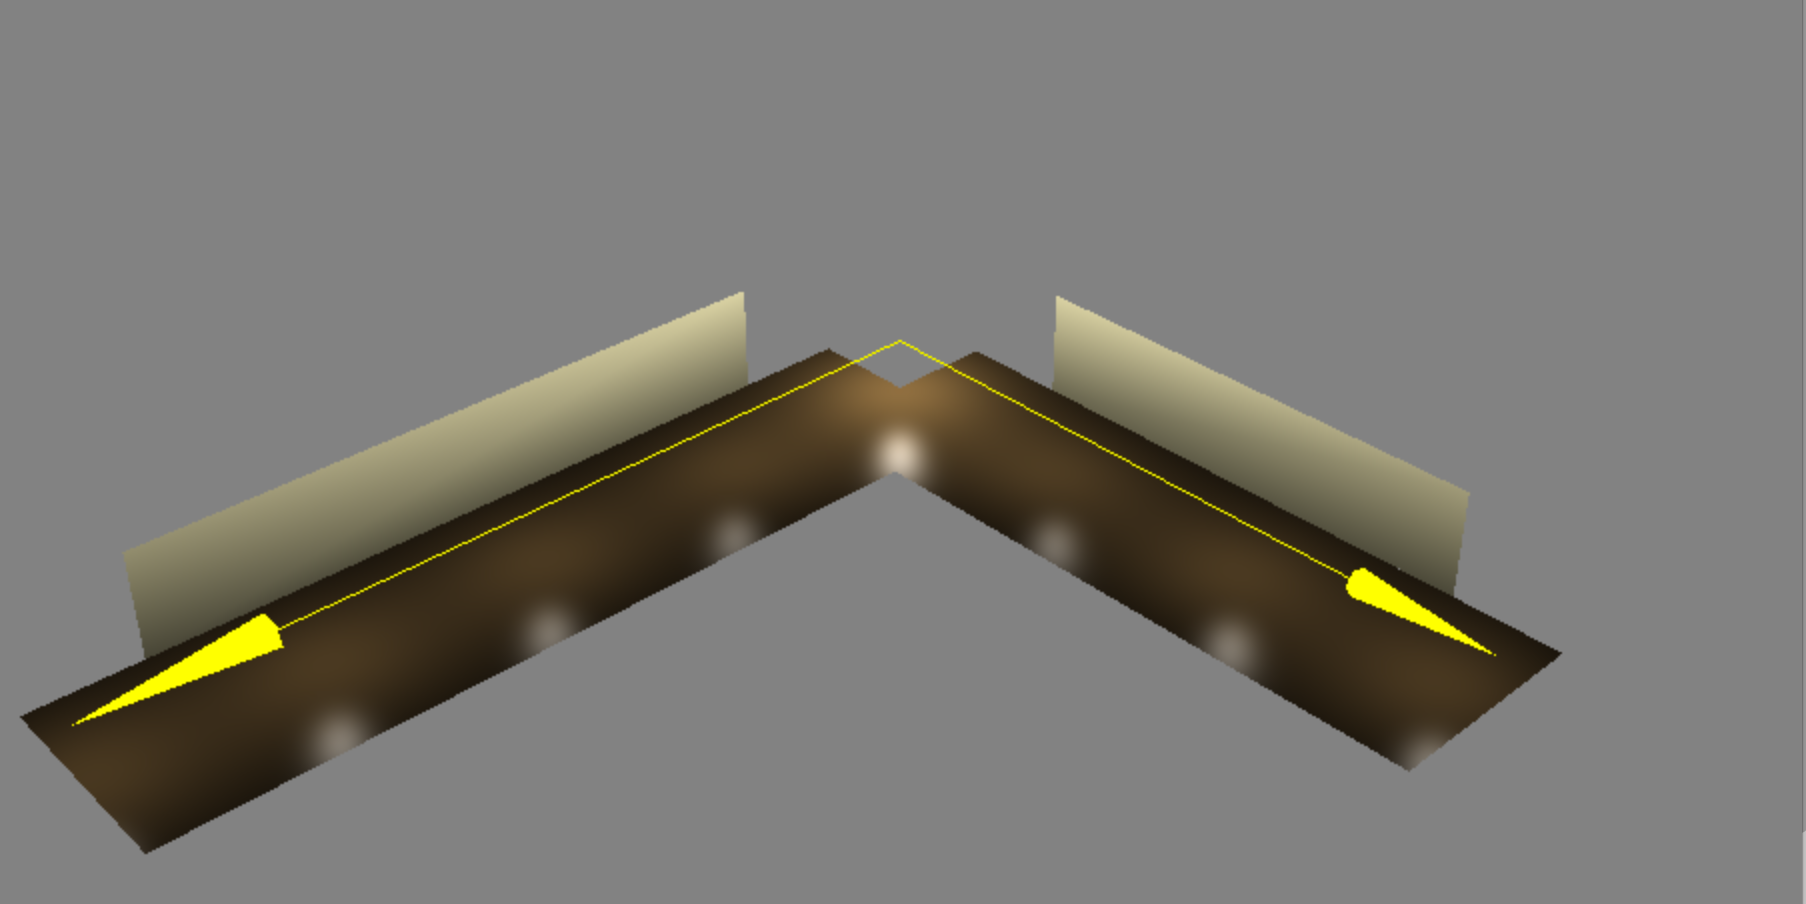
Aside: Grouping Objects into "Spaces"
But then, how does aligning the floor plane help us to align the other elements of a hallway - left wall, right wall, and lighting? Three.js has an excellent structure wherein an Object3D can contain other Object3Ds. So if we add all of the elements of a hallway (or to use the term that we use in our code, a "space") into a Group, then we can simply position the group as we had previously done with the floor.
With the alignment problem finally solved, we finally tried to integrate it into Daniel's code. We faced some problems at that point, but they were so specific to Daniel's existing code that it's probably not worth explaining them.
Adding 1st-Person Camera Functionality
The app already had pathfinding, but we wanted to make the process more immersive by making the user "fly along" the route in first-person.
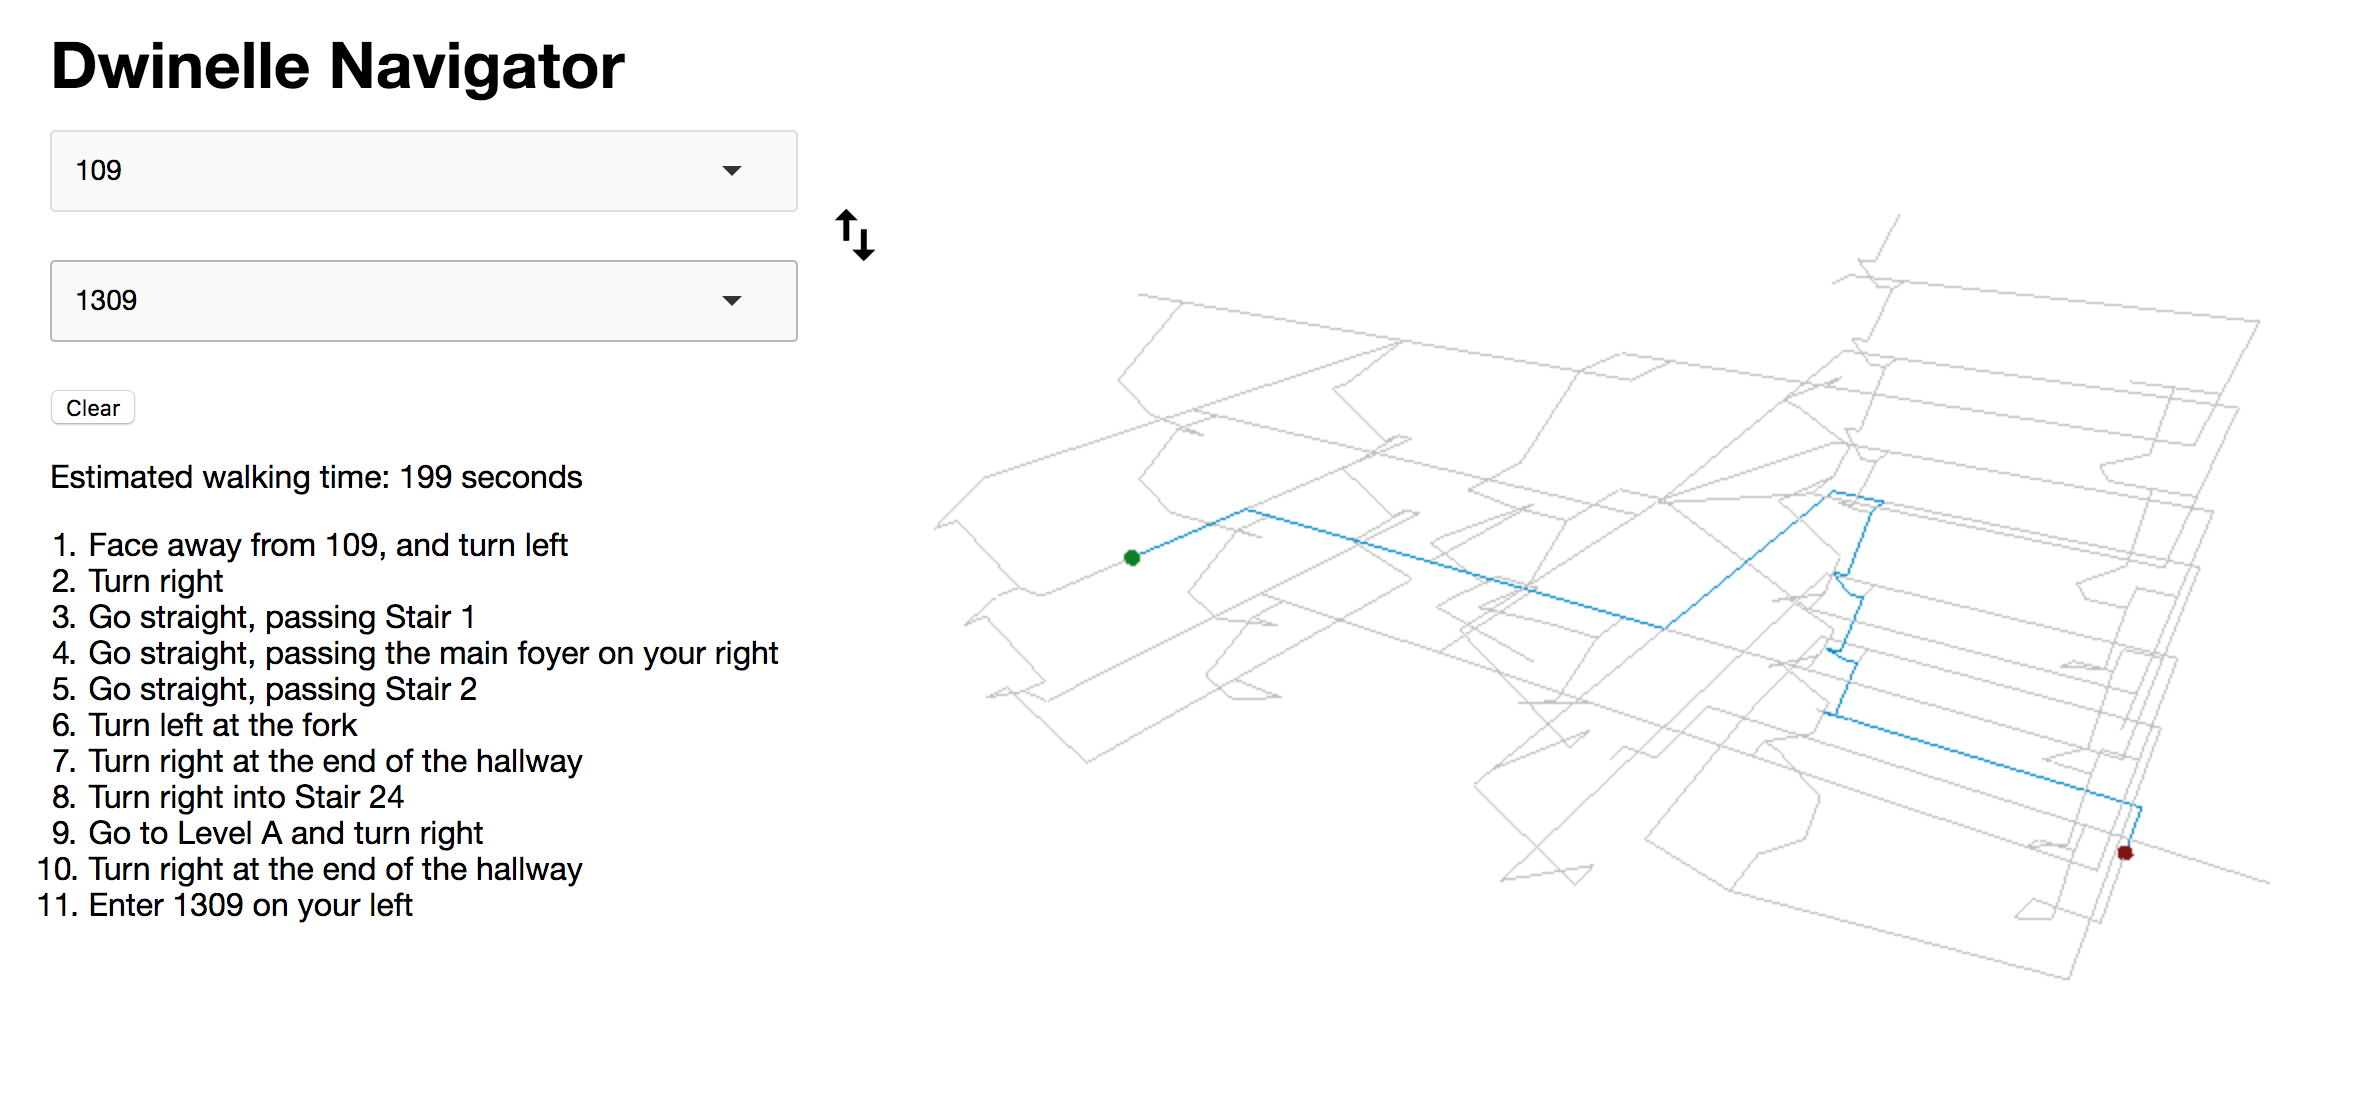
The best way to see what we mean by "1st-Person Camera Functionality" is to simply try out the app.
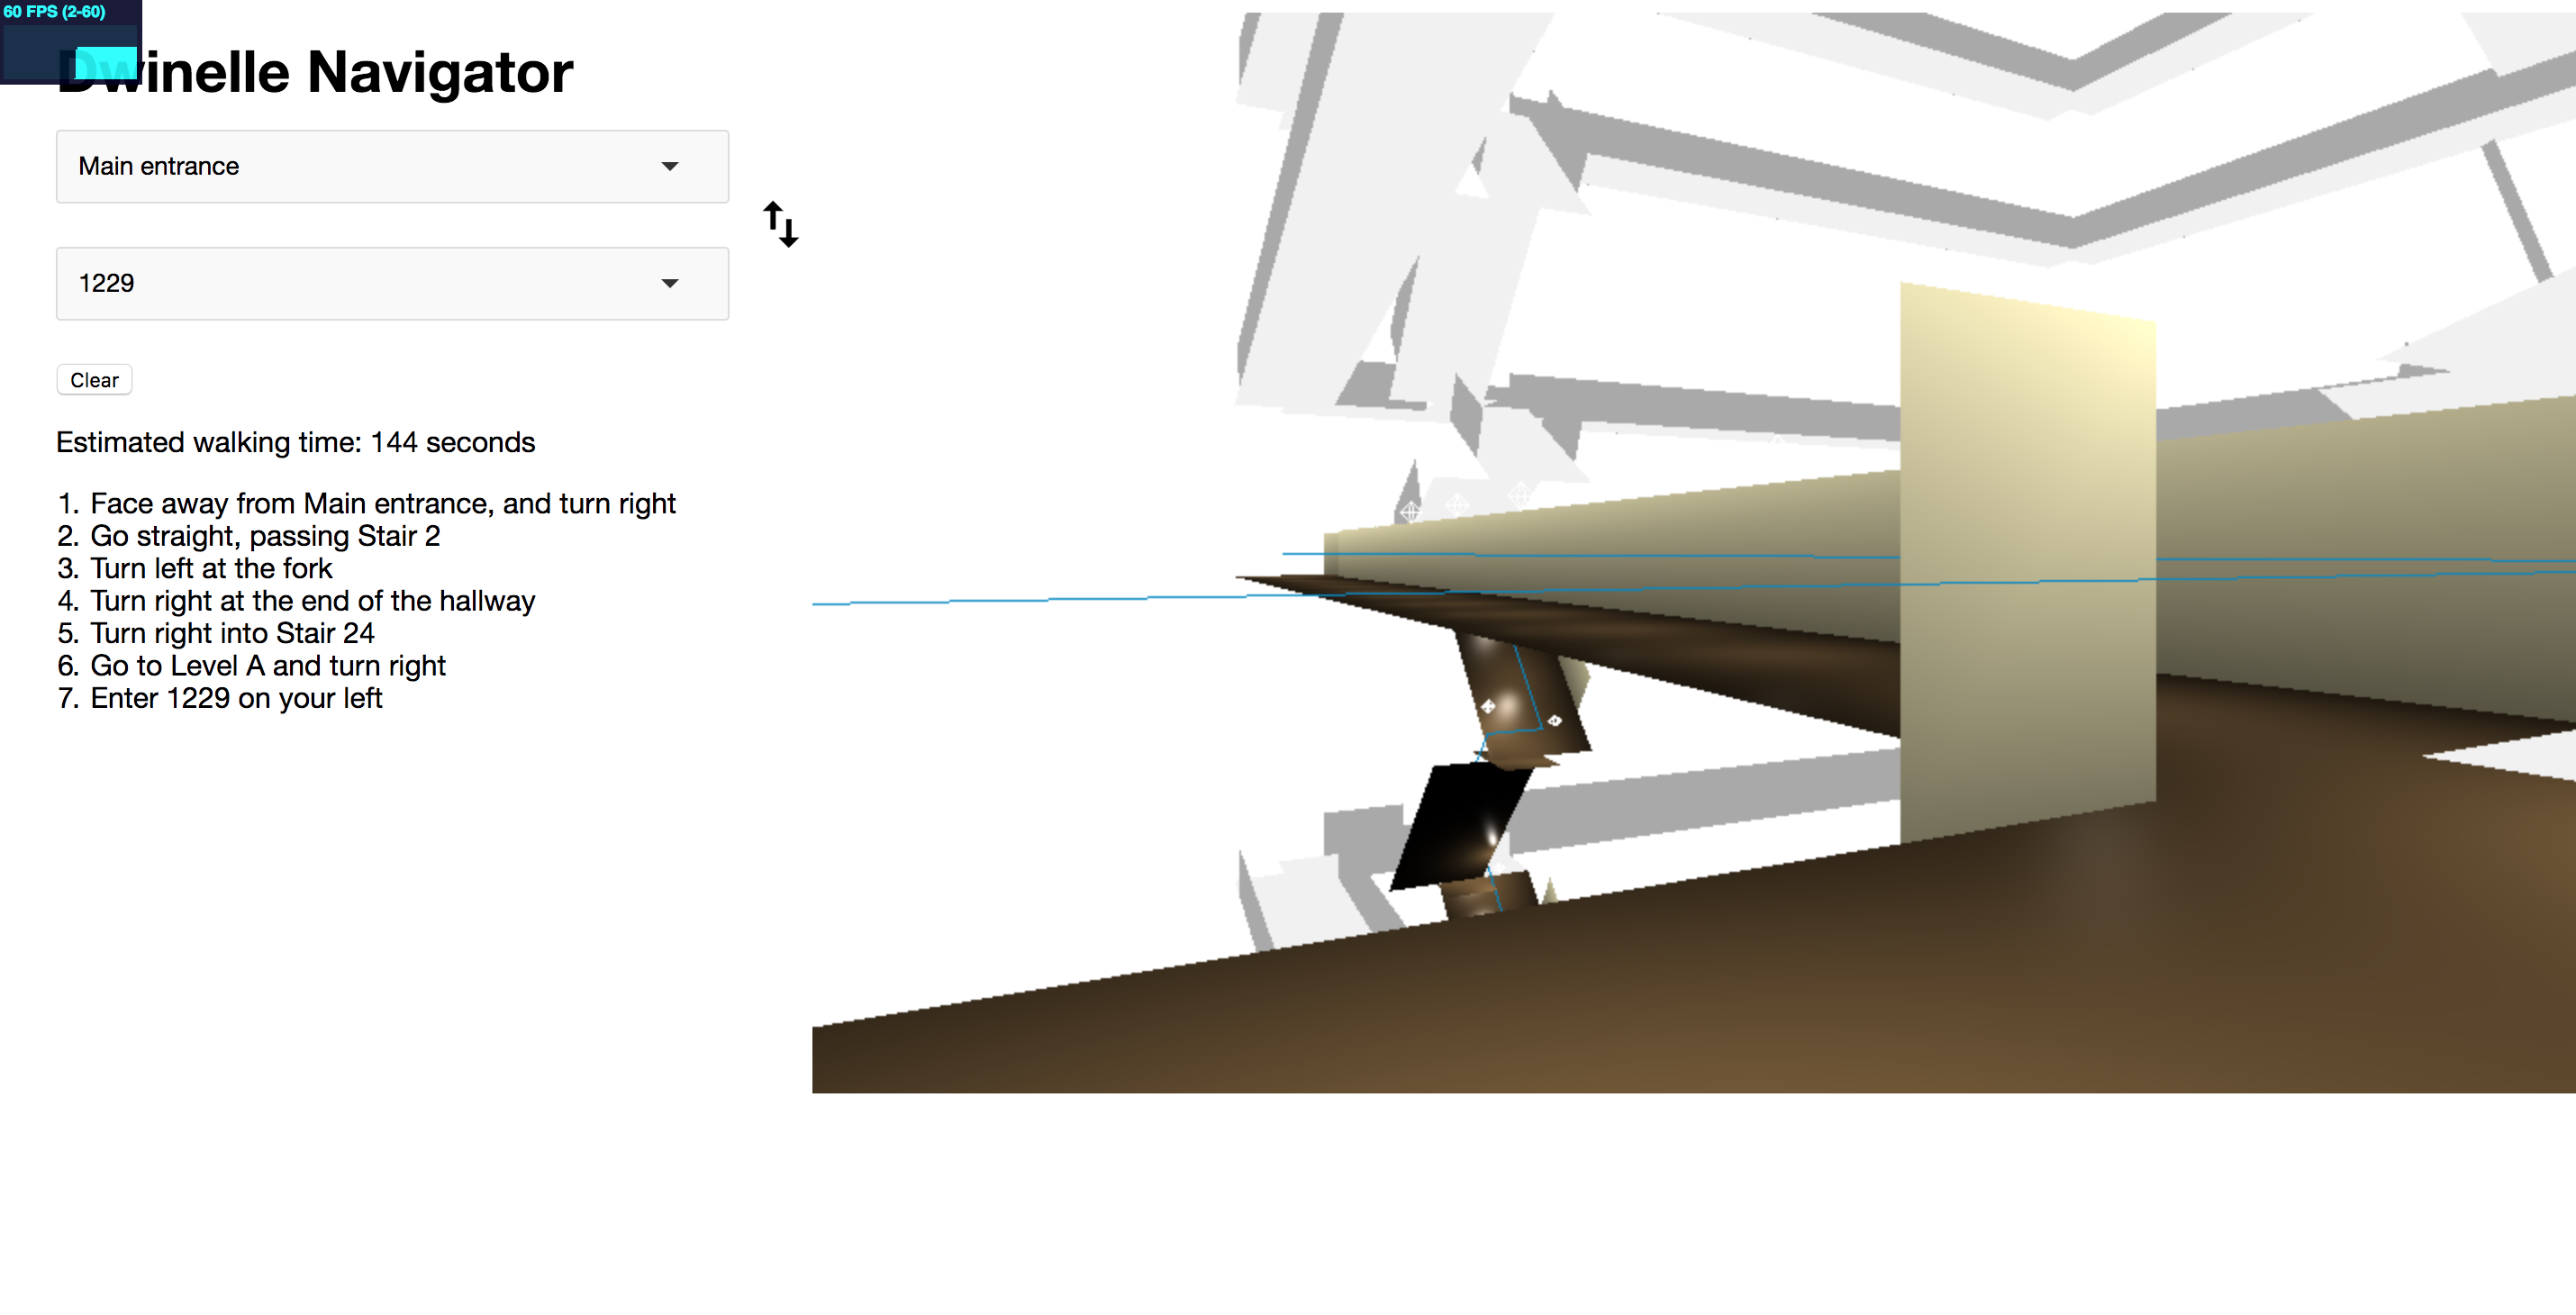
Our initial thought was to update the position attribute of the camera at a regular time interval to simulate the motion of the camera through space.
We quickly realized, though, that we would need to also update the lookAt of the camera, which would have the side effect of preventing the user from being able to pan around the space.
We decided then to work with two attributes of the OrbitControls library: controls.target and controls.maxDistance. Used together, these would cause the camera to fly along the vector as if pulled by a string.
The challenge, then, was how to interpolate over time. The cleanest way was to use Tween.js, a JavaScript interpolation library, and to write a recursive function that would chain these "tweens" together.
function nextCameraTween(path, index, sf, ef) {
    var start = convertVec(coords[path[index]]);
    var end = convertVec(coords[path[index+1]]);
    if (index === 0) {start = (new THREE.Vector3()).lerpVectors(start, end, sf);}
    if (index+1 === path.length - 1) {end = (new THREE.Vector3()).lerpVectors(start, end, 1-ef);}
    var tween = new TWEEN.Tween(start).to(end, 500+start.distanceTo(end)*1400/WALKING_SPEED_RATIO);
    tween.easing(TWEEN.Easing.Quadratic.InOut);
    var dir = (new THREE.Vector3()).subVectors(end, start).normalize();
    tween.onUpdate(function(){
        controls.target = start;
    });
    if (index === path.length - 2) {
        tween.onComplete(endPathAnimation);
        return tween;
    } else {
        return tween.chain(nextCameraTween(path,index+1, sf, ef));
    }
}
We had some trouble with pointers and the asynchronous nature of JavaScript at this point, but nothing insurmountable.
Environment Map
For this step, we found a creative approach by Bjørn Sandvik. The gist is to create a very large sphere, apply a texture to it, and then turn the sphere inside-out so that, from the camera's perspective, we are simply looking out at the world.
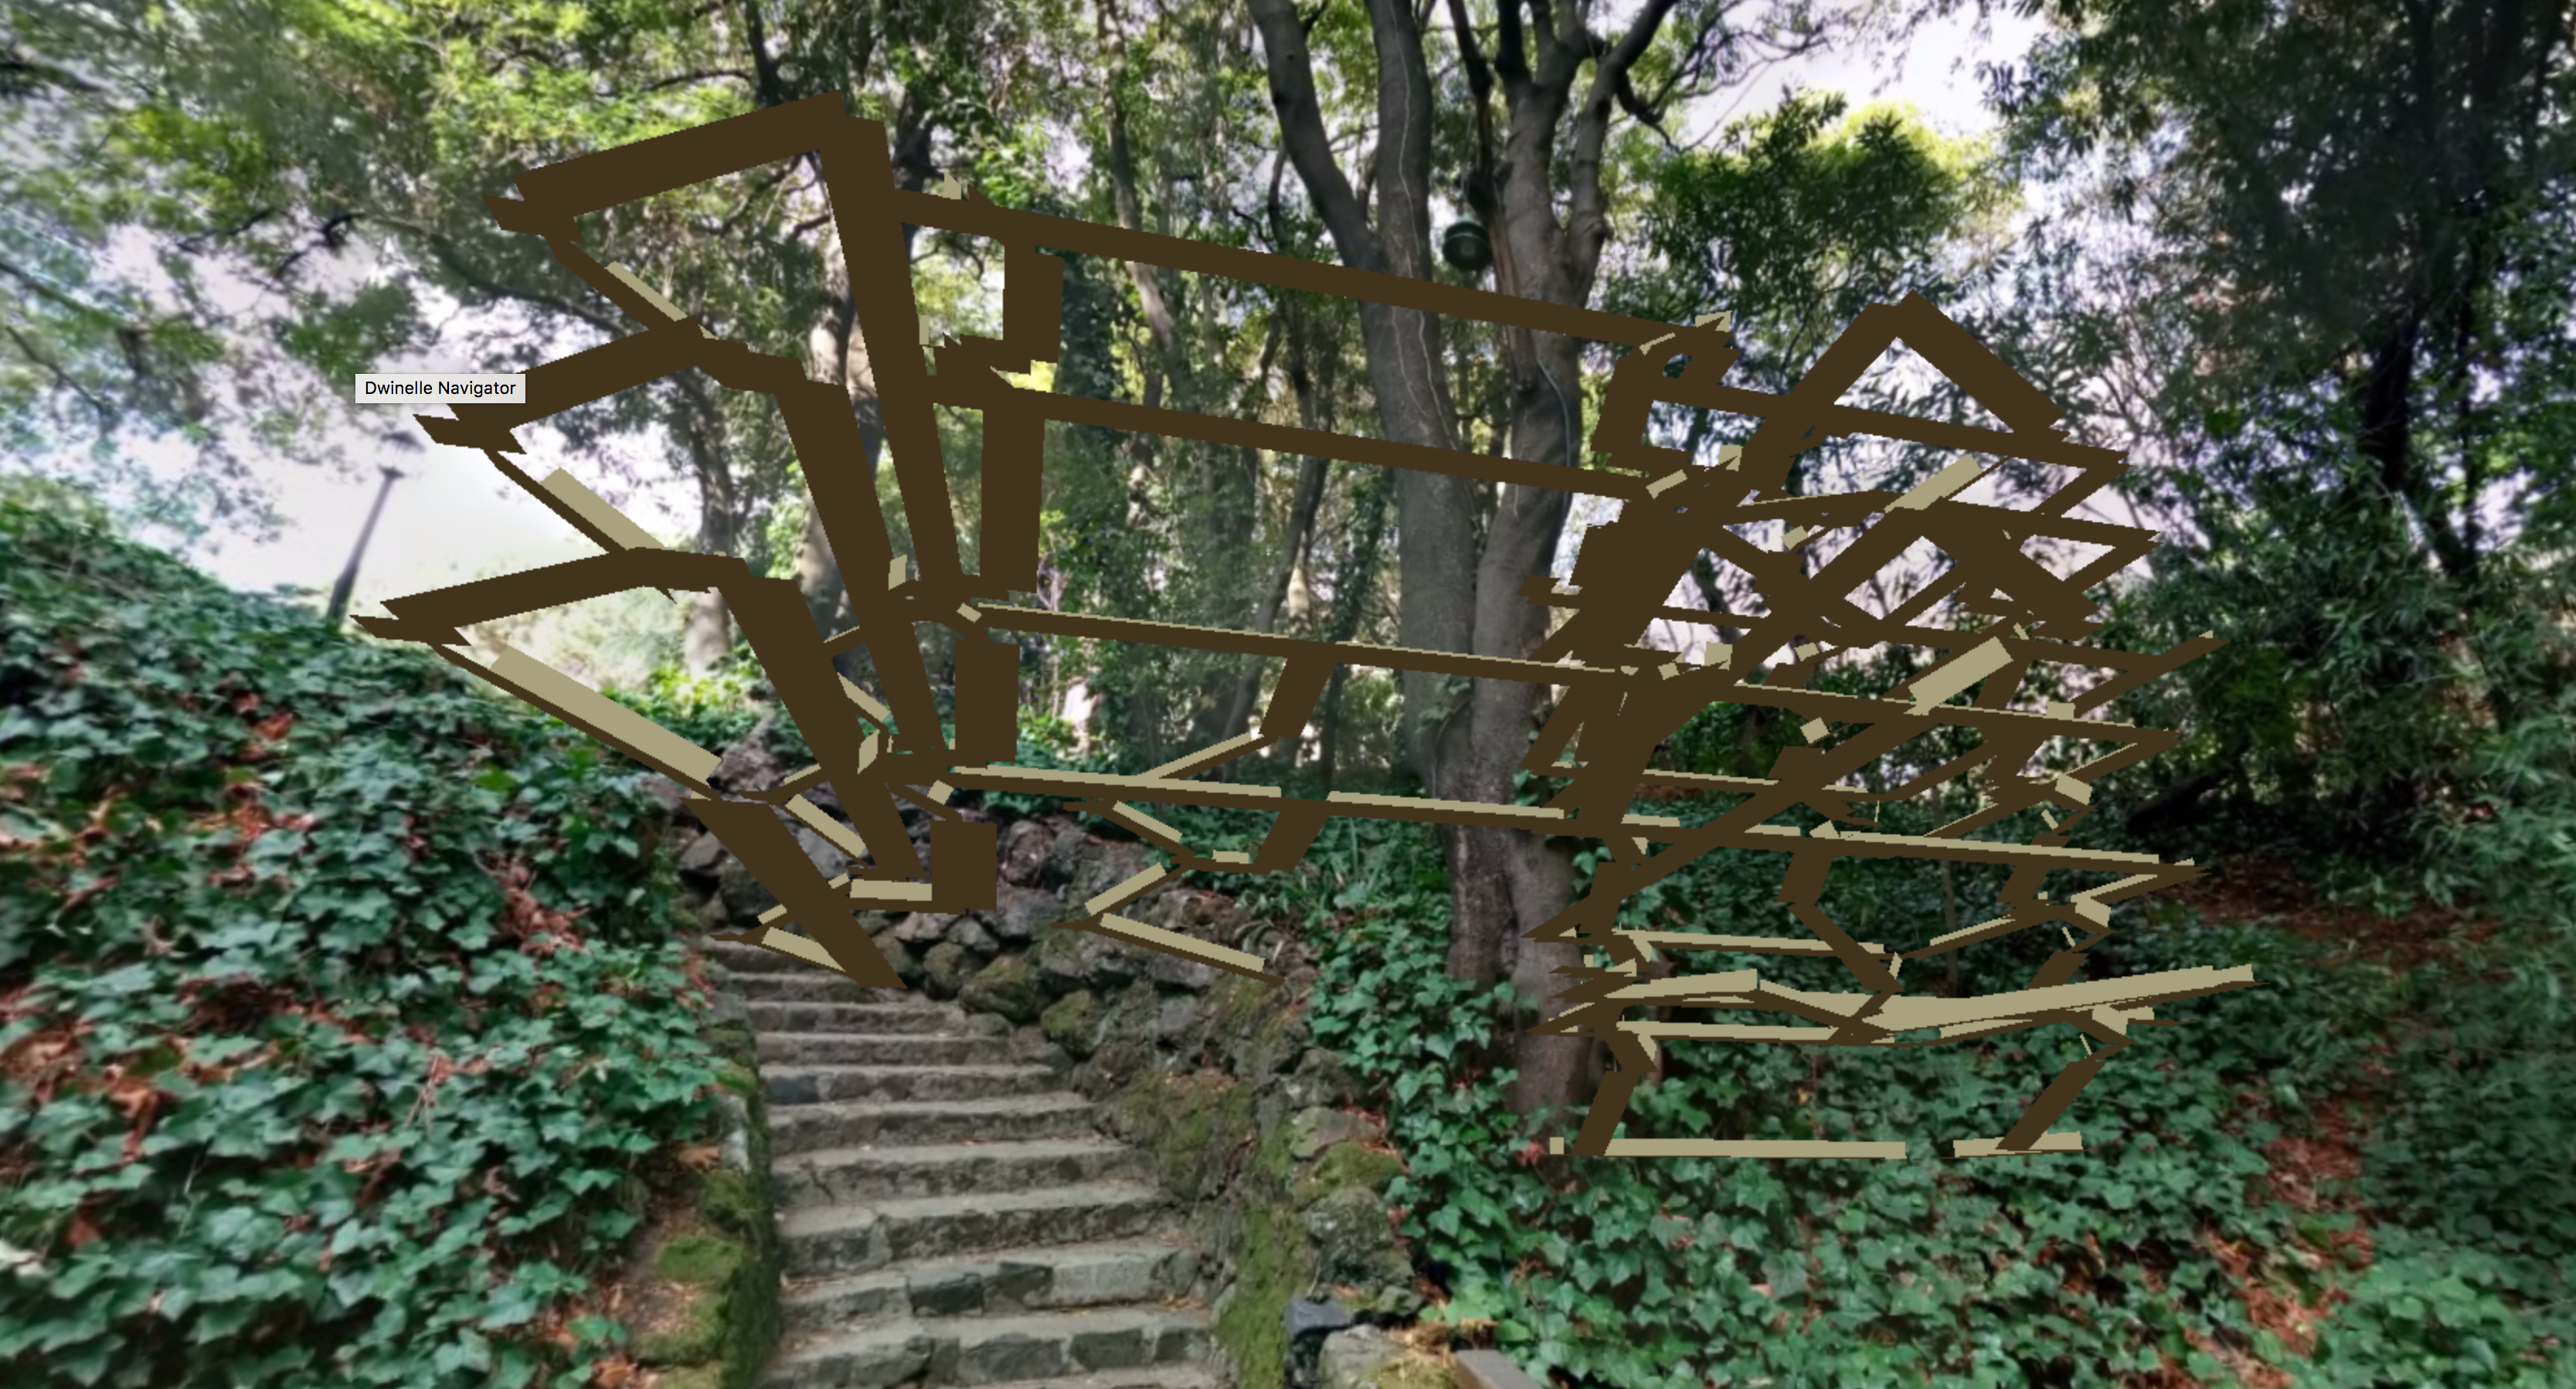
The source image is a photo sphere in the format of an Equirectangular Projection. It's an image that I took when crossing Strawberry Creek on campus a few years ago on my Nexus phone using the "Photo Sphere" functionality.
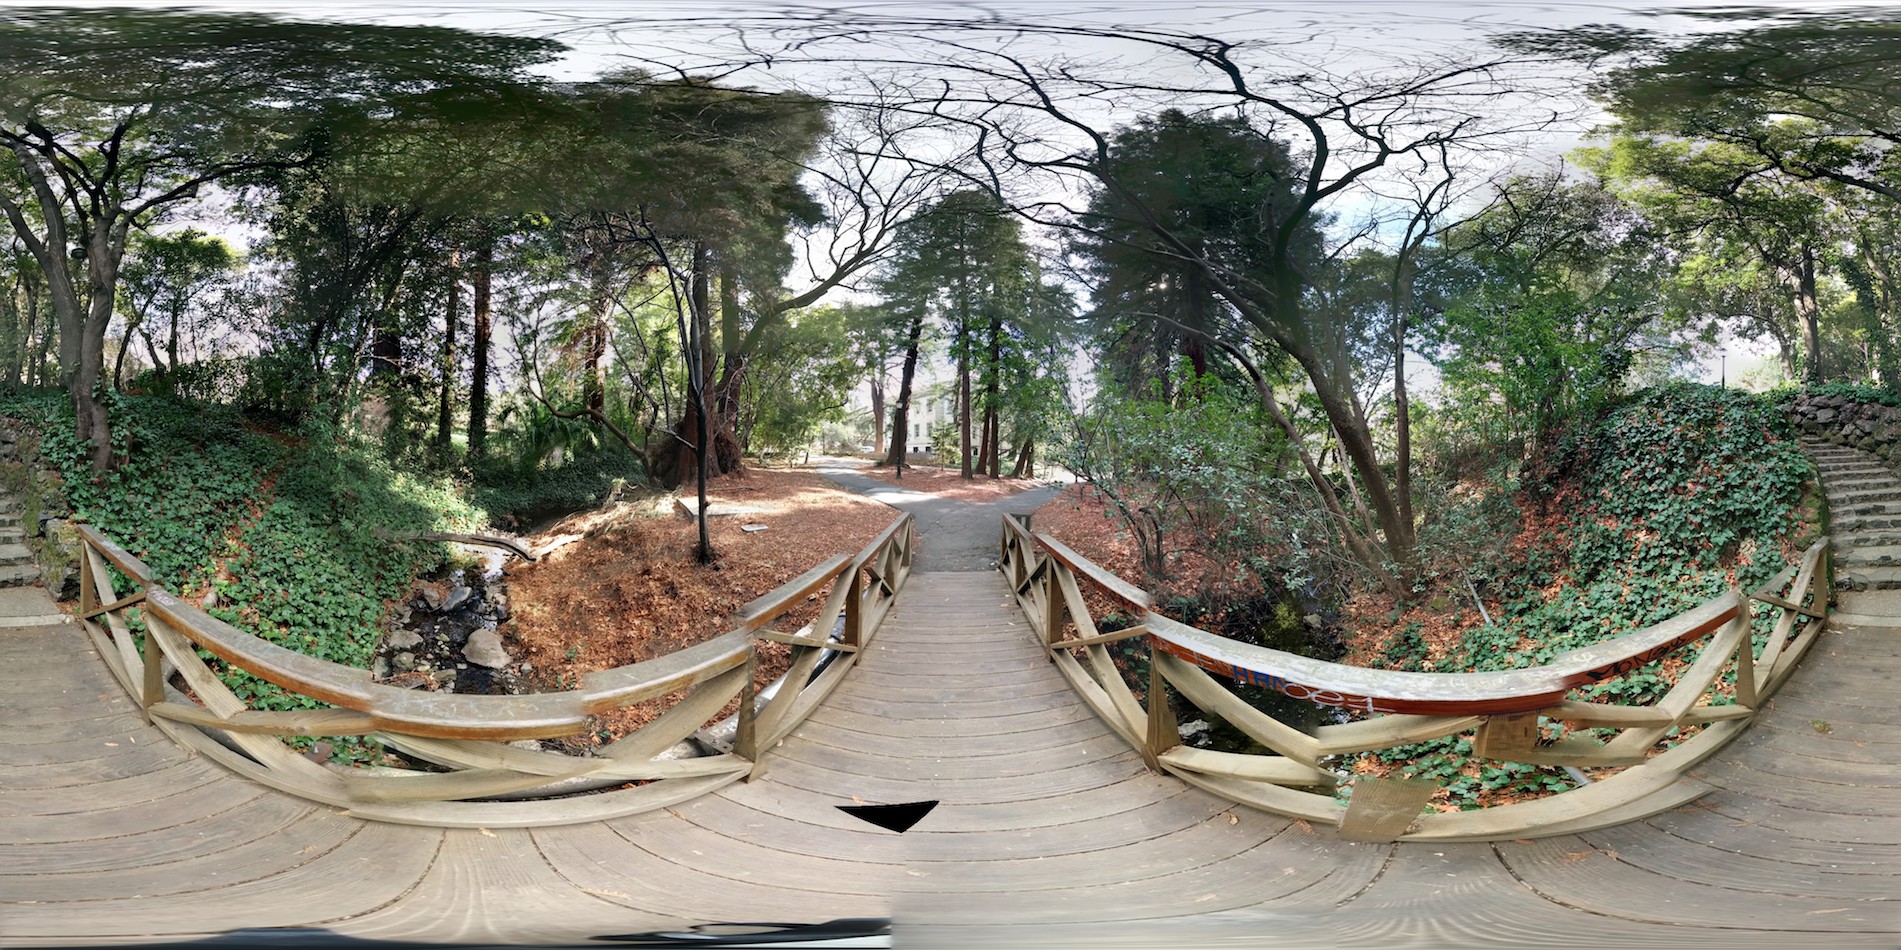
The implementation took much longer than it needed to due to cross-origin security limitations when you are opening an html page from a file in Chrome. Essentially, we had a problem where no matter what, we could not get a photo to appear as a texture in the model. It turned out that Chrome doesn't allow a website to directly access the file system for security reasons, so we needed to put the html page on a web server to develop this particular stage.
User Interface Improvements
User interface improvements are not really the focus of CS184, but we want to mention them anyway because they took some effort and some creativity.
Essentially, the original app had a perfectly functional user interface, but since the 3D model was not the focus of the original app, it had a different focus.
We made modifications to make it more user-friendly, such as:
- Making the model take up the full screen, regardless of screen size.
- Updating the layout, colours, and component design to match Google's Material Design standard.
- Adding a toggle to completely hide the larger menu - a useful feature for mobile users who would otherwise have the 3D model blocked by the menu.
We also added a few additional ways for the user to interact with the 3D model, including:
- walking speed adjustment to speed up or slow down the "fly-through" speed, and
- third-person/first-person toggle.
Results
Click Here for the Full-Screen DemoReferences
References are listed throughout the writeup, where relevant. I can't think of any that we forgot to mention.
Contributions from each team member
A lot of our brainstorming and programming was done together through pair programing. There were a number of tasks completed together and some done individually.
Shared:
- Three.js basics and basic hallway.
- Understanding Daniel’s code.
- Plane geometry before the breakthrough.
- Tweening.
- Final video.
- Final report.
Ollie:
- Break through with plane geometry.
- Structuring hallways as objects so planes can be defined in relation to each other.
- Rendering lighting effects for only the path traveled.
- Code restructuring / structuring.
- Procedurally generating a basic hallway.
Diana:
- Worked on tweening.
- Worked on adding walls to planes following vectors.
- Milestone website.
- Milestone video.
- Final presentation.